AWS — Launch an Instance

AWS — Launch an Instance
AWS — Launch an Instance
This is a tutorial step by step to launch an instance in AWS
Amazon Elastic Compute Cloud (Amazon EC2) is a web service that provides secure, resizable compute capacity in the cloud. It is designed to make web-scale cloud computing easier for developers. Amazon EC2’s simple web service interface allows you to obtain and configure capacity with minimal friction. It provides you with complete control of your computing resources and lets you run on Amazon’s proven computing environment. > docs
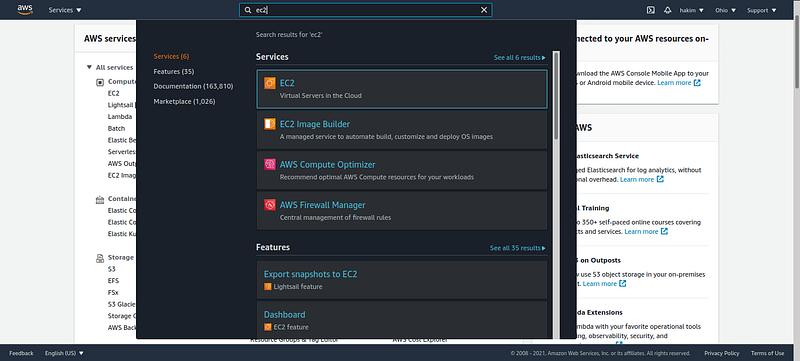
- Login in AWS account and go to the AWS Management Console > select the EC2 service.
- Launch a instance, click on button Launch instance
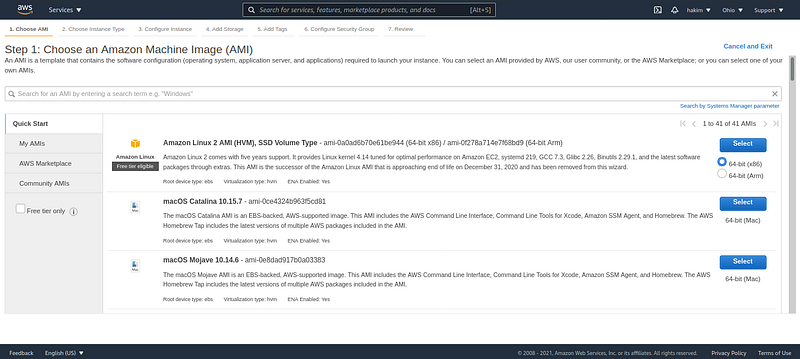
- Choose an Amazon Machine Image (AMI)In this case i’ am choose the one available under the free-tier option. Amazon Linux 2 AMI

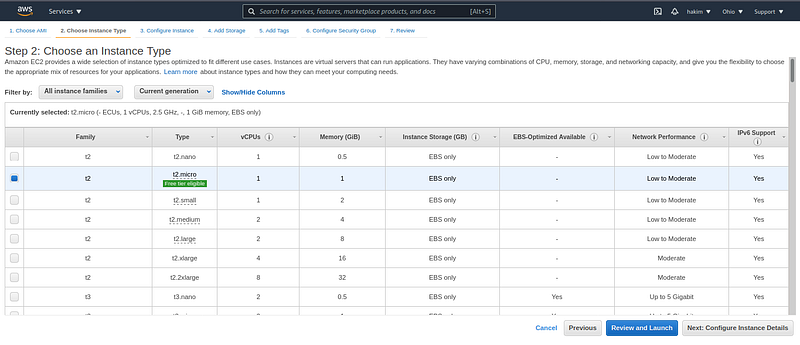
- Choose an instance typeIn this case iam choose instance type is t2.micro and then click Next: Configure Instance Detail
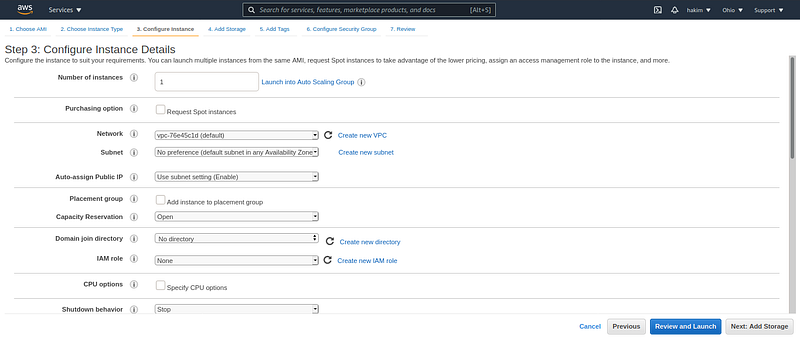
- Configure Instance Detail
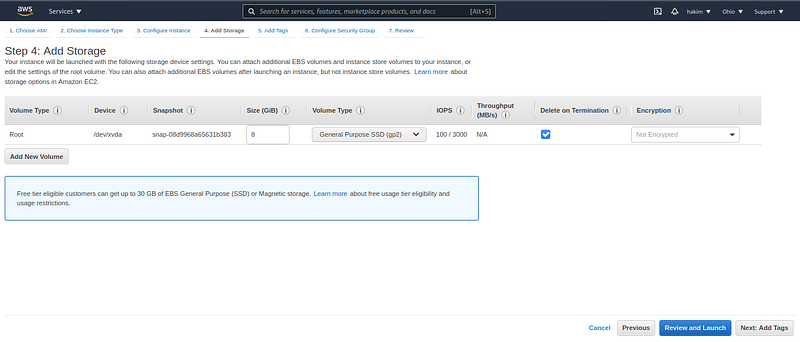
- Add Storage
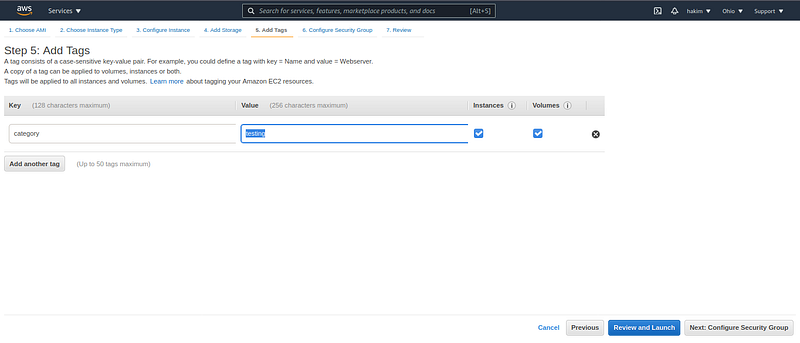
- Add TagsTags can as a label, tagging helps in easy search and grouping resources for various purposes.
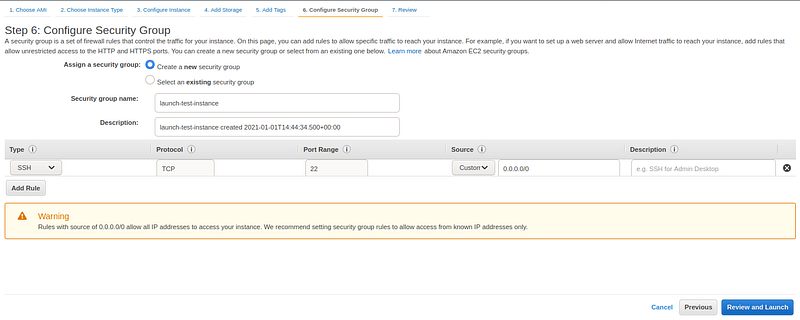
- Configure Security GroupAttach a set of firewall rules to your instance, then click Review and Launch
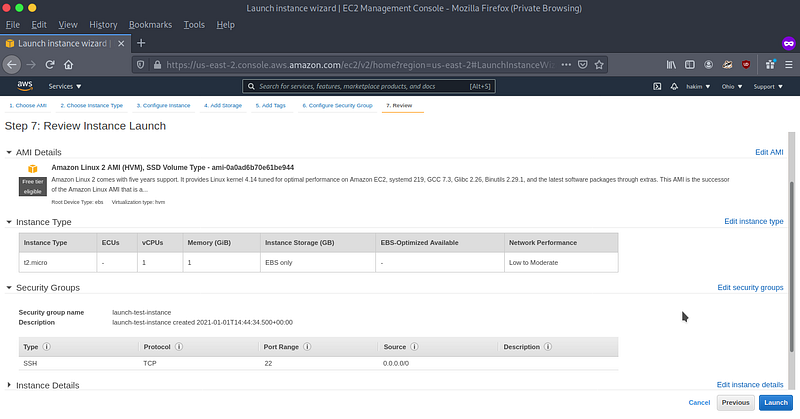
- Review InstanceReview the instance and if ok, Launch the instance
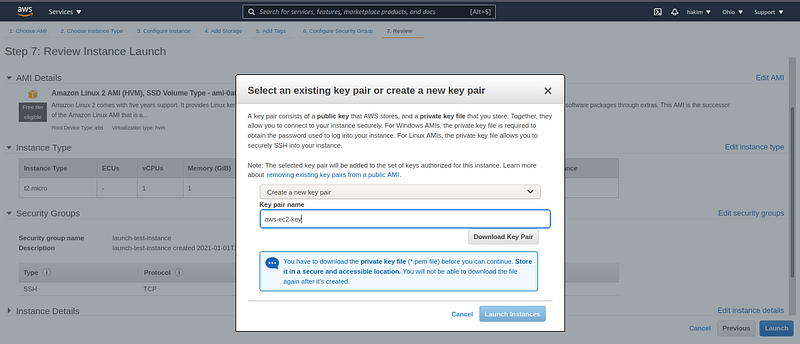
- Download Key PairDownload a key pair to connect your instance, choose
create a new key pair, putkey pair namethen clickDownload Key Pairbutton > Launch Instance
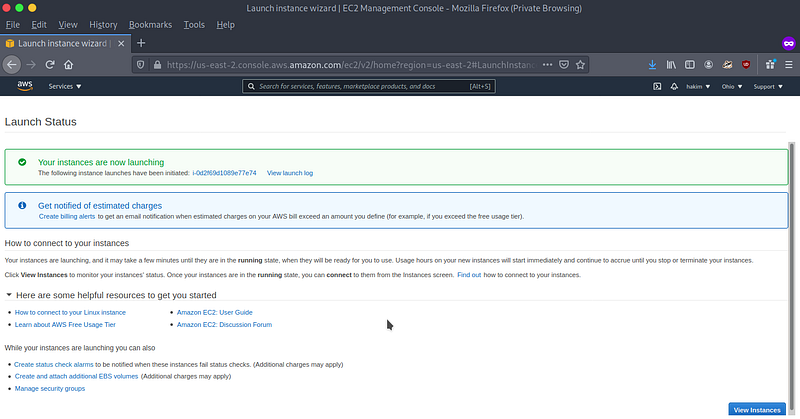
- Launch Status
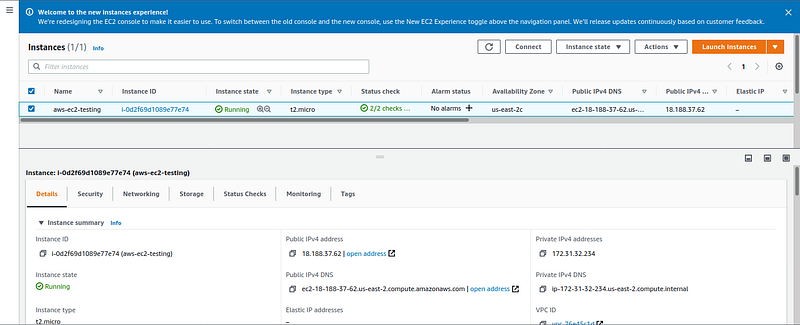
- View InstanceView instance detail such public IPv4 address, Public IPv4 DNS, security, networking and etc.
This post is licensed under CC BY 4.0 by the author.